SPC vinyl flooring has grabbed the attention of users due to its mind-blowing features such as extraordinary durability, aesthetic value, and scratch and water resistance. But installing this floor requires some tools as well as precise knowledge. Therefore, in this article, Flooring Dubai company has uncovered the complete procedure for installing SPC Click vinyl flooring. For DIY enthusiasts, we have made SPC flooring installation easy and reliable with smooth and fast click-lock techniques. Furthermore, we have also enlisted essential materials that you will need for your DIY floor installation project.
SPC Click Vinyl Flooring Installation: A Perfect Guide
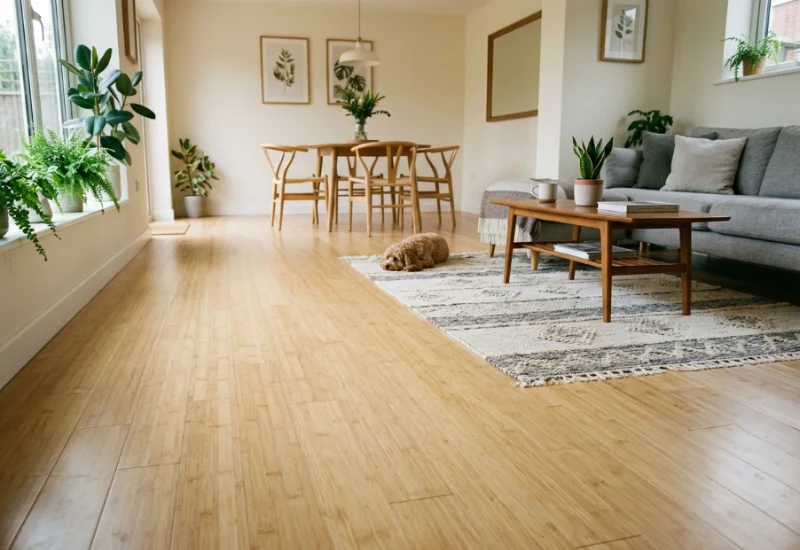
SPC Vinyl flooring in Dubai is a popular flooring choice due to its durability, moisture resistance, and easy installation. SPC (Stone Polymer Composite) flooring can be installed using click-lock or loose-lay methods, with the click-lock system being the most preferred for its secure and hassle-free fitting.
Made from limestone and polyvinyl chloride (PVC), SPC vinyl flooring offers excellent resistance to mold, moisture, and scratches, making it ideal for damp or high-traffic areas. Its multi-layer construction, including a rigid core, decorative layer, and protective top layer, ensures long-lasting performance and stylish appeal.

Essential Stuff Required To Install
- Measuring Tape
- Utility Knife
- Chalk Line or Pencil
- Straight Edge
- Protective Equipment
- Circular Saw
- Pry Bar
- Rubber Mallet
- Spacers
- Adhesive Materials
- Underlayment
- Transition Strips
Step 1: Choose The Flooring Layout
Before starting the installation process, you should analyze the flooring layout and laying pattern to avoid any inconvenience during installation. A reliable SPC flooring supplier will recommend laying planks on any straight and dominant wall and moving towards the rest of the areas. Since most floor areas aren’t even, for smooth plank laying, ensure the first row is placed parallel to a straight front wall for a clean and professional look.

Step 2: Remove Obstacles From Surrounding
Another important step that can’t be avoided before installation is removing obstacles from the surroundings. Use a pry bar to take off the moldings from the window and door edges. These moldings usually affect the look of the floor. The base shoe moldings, baseboards, and case moldings are the most common obstacles that should be removed. However, you can use the undercut saw to cut permanently fixed moldings.

Step 3: Subfloor Preparation
In this vital step, you need to prepare the subfloor surface by leveling it for a smooth and perfect installation. Without subfloor preparation, the SPC planks will not be firmly or evenly attached to the floor surface. If the floor surface has dents and spots, you should fix them by applying the leveling material. For concrete subfloors, use the patcher to fill the dents or spots. However, if you have a plan to fix vinyl-made SPC planks on the wooden subfloor, you can choose any high-quality leveling compound.

Step 4: Acclimatize The SPC Flooring Material
The process of flooring acclimatization has a significant impact on maintenance and durability. For acclimatizing, place the flooring material on the desired floor area 24-36 hours before starting the installation process. This extra time will allow the flooring material to adjust its temperature and humidity to environmental conditions. Furthermore, make sure that your surrounding temperature and humidity don’t fluctuate because it can cause cracking of the vinyl planks or tiles.

Step 5: Fix The First Row Of Vinyl Planks
After considering all the prerequisites, we will now start laying the first row of vinyl-made SPC planks. Install the first line of planks along the front dominant wall from the centered area and add cut-down planks on each side as per size requirements. Moreover, you should also leave a space of at least ¼ inch on each side of the line for the expansion of planks.

Step 6: Cut The Planks As Per Size
This process of cutting SPC planks requires precise skills and the right instruments for accurate results. The installer should have the expertise to cut the planks with a utility knife per specific size requirements. However, before cutting the planks, you should take precise measurements using a measuring tape. Then mark the lines on the plank surface with a pencil or marker for exact cutting. Rub the knife to the marked line with mild force, and then fold the SPC tile on the backside to break.

Step 7: Interlock The SPC Vinyl Planks
To install SPC flooring planks securely, use the edge-to-edge or end-to-end click-lock method. This floating installation technique aligns adjacent planks at the same angle while leaving a small expansion gap around the edges for proper floor movement. For a tight and seamless fit, gently tap the planks into place using a rubber mallet or soft hammer. Avoid using metallic hammers, as they may crack or damage the SPC flooring planks.

Step 8: Cut Planks For Protrusions
During the installation of flooring, multiple protrusions or obstacles emerge, such as door frames, door ducts, side corners, or pillars. You need to cut these planks with a sharp knife or circular saw per their size and shape requirements. After the initial cutting, try to fix the plank at the desired angle with a rubber mallet. Fixing the irregular-sized planks around protrusions is the most technical and time-consuming step.

Step 9: Place The Final Planks
In this step, we will complete the installation procedure by placing the rest of the planks in the final rows. Take accurate measurements of the rows with a metal measuring tape and adjust them per plank size. Like the first row, make sure that you have left the suspension gap on each side of the rows. For the final row plank installation, use a straight-edged and sharp utility knife to precisely cut the planks for parallel fixing with the wall.

Step 10: Reinstall The Trims Or Moldings
After completing the installation process, you should now reinstall all the baseboards or trim moldings. For their fixation, use metallic nails or screws with a hammer or screwdriver, respectively. To avoid surface damage, you can also attach them around protrusions with heavy-duty adhesive materials.

Final Thought!
It can be said that the installation of SPC Click vinyl flooring is a somewhat easy process for DIY enthusiasts. Dubai Vinyl Flooring has demonstrated an entire installation procedure in 10 simple and effective steps. By following these valuable steps, you can also install these vinyl-made SPC planks in a very short time and on an optimized budget. Good luck with your floor installation project!